Friday, February 24, 2012

Beauty and the Heat

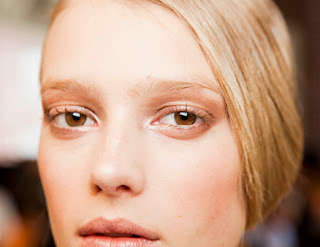
Yes, that picture embodies what I feel like on most summer days. I feel even more this way when I'm out in the sun, with make-up on. Sun plus makeup creates one of the most yucky feelings, and, what is more, you can't wipe that sweat dripping off your forehead. Talk about torture...
I think we'd all rather feel like this. I've found out some things about summer beauty the hard way, but I'd like to spare you all the trouble. Below, I've listed my tips for feeling fresh and breezy, even during the most oppressive heat.
Go minimal: Don't wear as much makeup or as heavy of formulas in the summer. If you are used to wearing liquid foundation, start wearing a light mineral foundation; if you only wear mineral then go bare, only using concealer when needed. This sounds odd, but your skin will actually improve if you don't let your sweat mix with makeup. I'll list my summer essentials in a later post.
Let your hair go: I found out too late, that summer does not look kindly upon full bangs/fringes. I suffered through the heat, rarely able to let them down, and, when I did, they became sweaty and gross within the hour. Instead, grow out your full bangs in favor of face framing layers. Wash your tresses with a moisturizing formula (I like Suave Almond/Shea Butter), and avoid too much sun exposure. This will prevent your hair from getting brittle, breaking, and creating fly aways. Let your hair thrive in its natural texture, heat styling occasionally.
Move it: I can not stress the importance of excercise. It revs up your metabolism, enables your body to rid itself of toxins, and boosts positive thoughts. Excercise especially helps your skin, because it clears your pores, and brings the blood to the surface, making any imperfections heal at a quicker pace. Summer is a great time for moving; get out a take a walk or run, ride a bike, or swim. Make yourself a goal, like jogging for 30 minutes every day or doing 25 push-ups. You will find yourself enjoying the challenge, and feeling better and more accomplished. It may seem silly, but excercise should be a part of your beauty routine.
I'll be posting my Summer Beauty Tutorial in the near future!

Thursday, February 23, 2012

Cold and Slightly Savory Bliss

I'm talking about that glorious dessert, Salted Caramel Ice Cream. Its texture is rich and smooth, and its flavor is complex and rather alluring. In other words, you want MORE!! Trust me, is is well worth your time...

1 1/4 cups sugar, divided
2 1/4 cups heavy cream, divided
1/2 teaspoon flaky sea salt such as Maldon
1/2 teaspoon pure vanilla extract
1 cup whole milk
3 large eggs

Heat 1 cup sugar in a large saucepan over medium heat, stirring with a fork to heat sugar evenly, until it starts to melt, then stop stirring and cook, swirling skillet occasionally so sugar melts evenly, until it is dark amber. (This step will take a very long time, so hold your horses...

Add 1 1/4 cups cream and cook, stirring, until all of caramel has dissolved. (Note: the liquidized sugar will bind up in reaction to the coolness of the cream. Don't panic, it will dissolve with patient stirring.) Transfer to a bowl and stir in sea salt and vanilla. Cool to room temperature.

Meanwhile, bring milk, remaining cup cream, and remaining 1/4 cup sugar just to a boil in a small heavy saucepan, stirring occasionally.

Thoroughly whisk eggs in a medium bowl, then add half of hot milk mixture in a slow stream, whisking constantly. Pour back into saucepan and cook over medium heat, stirring constantly with a wooden spoon, until custard coats back of spoon (do not let boil!!). Pour custard through a fine-mesh sieve, using a spoon to manipulate the custard past any lumps into a large bowl, then stir in cooled caramel.

Pour liquid into ice cream maker, and let the maker run its cycle.  The ice cream will be soft serve, so freeze it in the canister or an airtight container to firm it up.

Happy Eating!


Friday, February 17, 2012

Pictures+Trends= Inspiration

You all may have seen my newest poll, and thought, "What? I haven't heard of any of these things." If you haven't let me introduce my four favorite beauty trends of Winter/Spring 2012:

Bold Brows: I love, love bold brows! They totally change the look of your face, and really give a elegant look to your eyes.

How to: Just don't pluck, except to nab stray hairs that grow outside your natural eyebrow perimeters. If you want a slightly bolder look, purchase an eye pencil (If you are a brunette, buy a shade lighter than your natural color; if you are blonde buy a shade darker) and make small flicks in the same direction as the hairs grow. Then take either a clear mascara or an eyebrow comb and brush the color, blending it in with the brow.

Glossy Lids: This is a different look, but are very pretty and easy to do. Just don't use anything but a neutral color. Shiny plus intense color can look too circus-y!


How to: First take a neutral shade of eyeshadow (such as taupe, medium brown, or light gold) and apply it to your entire lid. By lid, I mean from your eyelashes to your crease. (You can identify your crease by closing your eye and feeling around for the area where your eyeball meets the bone. That is your crease.) Next take a very small amount of petroleum jelly, and pat it onto your lid, on top of the eyeshadow. Do not rub it. The warmth of your skin will make it smooth out, and rubbing will only diffuse the the eyeshadow. If you use the proper small amount of petroleum it will give your eyes a subtle glow...we aren't going for a glossy, lacquered look.

Navy Nails: Although I'm not a "dark" polish person, I love the look of these. Just make sure that the polish has some shimmer, otherwise you'll end up looking a bit, well, gothic.

How To: First, your nails cannot be long if you do this manicure. Trust me, it looks bad. See my previous article (Q and A Beauty Edition) for directions on a long-lasting manicure. Make sure to add a top coat too!

Extreme Curl/Frizz: This hairstyle is quite practical, especially for days when your hair won't do a thing. Your hair will do this. Anytime. And look naturally cute while doing it.


How to: Take dry hair divide hair into sections. The number of sections will depend on the thickness of your hair. I only need 5 sections, while one of my sisters, Kay, would probably need about 12. (Ok, ok, I'm jealous.) The divisions don't have to be precise. Just take each section of hair, and twist it and twist it, until it has a squiggly sort of bun against your head. Take a hair band and, while holding the mini bun securely, wrap it around the base of the of the bun, making it tight. Once you have repeated for all your sections, then either let them sit in your hair for several hours, or take a blow dryer and blow it on each bun. This will heat up the hair, helping to  retain the curl, and speeding up the process. If you use a hair dryer, you only need to let the mini buns sit  for a half hour. 

Take the buns out, run your fingers  through the curls, and mist with all over with a light veil of hairspray. If you want more volume, brush out curls, but don't pull on them. Then gradually work through hair, holding a section perpendicular to your head and hairspraying it, as you gradually let the hair fall. You can also tease hair for additional volume.

One last note... These beauty ideas are very different. Experiment before you rock these looks in public, simply because confidence is the key! So, try something new; you might discover your new signature look.

P.S. Vote on the poll: which look would you try?

Thursday, February 16, 2012

Tough Love


You might recognize this face. If you do, it's accompanied by a voice yelling, "You can always push harder, you can always do more! So give it to me!!!" Yes, I'm talking about Jillian Michaels.

A little over a year ago, I had never heard of her. I also grudgingly ate a half cup of salad every evening during dinner, and glumly walked a half mile on the treadmill at the gym. But, there came a time, when that part of my brain grew up, making me realize that I wasn't being a good steward with the body that God gave me. Jillian Michaels has been a key part of my fitness journey, helping me to realize that healthy eating isn't a "diet", it is a lifestyle. Her workouts have been springboards, showing me that I can do more, and I can motivate myself.

That is my story, and I thank God for bringing me a responsible perspective on my health.

Well, most of you know about this part of Jillian...

...but not all of you may know about Jillian the cookbook writer...
If I could only keep one cookbook out of my entire collection, this would be the one I would pick. And that is saying something. The introduction to this cookbook is hefty and informative, giving you directions for cleaning your eating habits, an overview on hormones (and how they are effected by your diet), and lists of the best choices from different power nutrient food groups (ie legumes, berries, cruciferous vegetables, dairy). Jillian has a list of things not to eat, like hydrogenated fats (duh!) and high fructose corn syrup. In short, she is very reasonable, and her food could be easily cooked every day. It's simple. It's delicious. It's healthy.

I'd like to share one of my favorite recipes from the book, her banana blueberry muffins. I've made them about six times, freezing them for a convenient breakfast.

Jillian Michael's Blueberry Banana Muffins
Makes 12 muffins

2 very ripe bananas, mashed
3/4 cup non-fat plain yogurt
1/3 cup honey
1/3 cup olive oil
2 tsp. vanilla extract
2 1/2 cups whole wheat flour
2 tsp. baking powder
1/2 tsp baking soda
1/2 tsp salt
1 cup frozen or fresh blueberries

Preheat oven to 425 degrees, and spray 12-cup muffin tin with olive oil or line with paper liners. Mix bananas, yogurt, honey, olive oil, and vanilla. Add the dry ingredients to the wet, stirring until just combined. Fold in blueberries. Spoon batter into muffin tin, place tin in oven, and reduce heat to 400 degrees. Bake for 18-20 minutes, or until tops spring back when touched. Remove from oven, and let cool for 10 minutes. You can store them in an airtight container at room temp. for up to 3 days or in the freezer for up to 2 months.
216 kcal each; fat 6.8g; protein 4.5g; carbs 37.1g; sodium 234.5mg

Tuesday, February 14, 2012

Q's and A's: Beauty Edition


Q: My feet are dry and scaly! What can I do for a quick fix?

A: Do this in the evening: First, soak feet in warm water. Take a washcloth and scrub the softened skin, removing all dead skin. Lastly, slather feet with petroleum jelly, and put on some socks. In the morning, you will wake up to soft feet!

Q: My hair is dull, and I can't seem to get it to become shiny no matter how many "moisturizing" hair products I use.

A: You can do two things about this problem. First, mix a little bit of lemon juice and vinegar with quarter size dab of your shampoo, mixing with your fingers. This compound with thoroughly cleanse hair of any buildup. Next, let your conditioner sit in your hair for a full 3 minutes, rinsing out with cool water. Comb, and let dry in a loose braid.

Q: My nail polish keeps chipping, even though it's only been a day or so since I painted my nails.

A: My first recommendation is to buff your bare nails with a multi-sided nail buffer (you can find them for about a dollar!), then take some kind of oil and push back cuticles. Next, and most importantly, take a cotton ball dipped in either rubbing alcohol or nail polish remover and run it over nails. This will remove all moisture from between the nail and the paint, making it easier to dry and remain hard.

Q: What's the trick to getting the perfect red lip?

A: I've seen a lot of methods, but have come up with my own, which I find to be much simpler. First, moisturize about 30 minutes to an hour in advance, depending on how dry your lips are. Read: slather on the carmex, lip balm, petroleum jelly! Next, take a warm, damp wash cloth and scrub those lips. If you have any flaky, dead skin, red lipstick will make it show like crazy. Next, I apply a lip balm, like Burt's Bees, to help the lipstick apply evenly. Apply that color straight from the tube, focusing on the middle of the lip. If you heavily apply color to the edges of your lip, you will end up with a clownish look...not cute. Then, grab a paper towel and blot your lips, which means give that paper a KISS! Lastly, take your finger, rubbing a little bit lipstick onto it and dab this onto the middle of your lips. Press lips together, and you're ready to go! (Don't top with a shiny gloss, as this can look like too much. That lip balm will have provided all the moisture  you need for a red lip.)


PS Next week, I will return with a second round of questions. If you have a query, comment below, and I'll try to answer it.

PPS I'm also working on that Biscotti tutorial.

Saturday, February 11, 2012

From Scratch: Tortillas


One of  the most wonderful "fresh" things to eat is a warm tortilla. It doesn't even taste similar to the room-temp store bought variety. Plus, a warm tortilla has so many possibilities: peanut butter and banana, nutella, pb&J, butter, cinnamon and sugar, fresh fruit and whipped cream, breakfast burrito, a traditional bean burrito, or their flavors can be enjoyed by themselves. (Kid alert: And they're super easy to make!)

2 cups flour
1/2 tsp. salt
1/2 tsp. baking powder
1/4 vegetable shortening (or you can use 2 tbsp shortening, or 2 tbsp butter)
1/2 cup hot water
Additional flour

Mix dry ingredients, working in shortening with a pastry cutter or hands, until  dough resembles course sand. Add hot water, and stir until a soft, sticky dough forms. Place dough on floured surface, dusting hands with flour, knead for about a minute, adding more flour if the dough sticks.

Cover dough with damp, clean towel and set aside for 10 minutes.

Cut dough ball into 12 sections, forming each section into a smaller ball. Then let rest for 15 minutes. Meanwhile, heat griddle over  medium-high heat for 5 minutes. Sprinkle more flour on a work surface, then roll a dough ball into a circle that is 1/4 to 1/8 inch thick, then 6-7 inches across. Repeat in batches for  each tortilla. Place tortilla on hot griddle for 30 seconds, until it has light brown  spots on the bottom. Use a spatula to turn tortilla, letting it cook for 15-20 seconds on other side. Wrap all tortillas in a dry towel to keep them warm until they are served. Enjoy!

Wednesday, February 8, 2012

Bare Essentials

Today, I'm going to share my favorite personal products. These are just basic items I use daily, and love because of their effectiveness.

P.S. I will be putting together a blog post in a week about beauty questions and "how-tos". If you have any questions please comment below, and I will include them in the article.

P.P.S. Once again, please vote on the poll! I will do a tutorial on the winning item. 

Friday, February 3, 2012

Carrot Pineapple Bread

 
This recipe can be used for a sweet breakfast treat, or used as an almost-healthy dessert, when baked in muffin form and topped with rich cream cheese frosting.


3 cups all-purpose flour
1 tsp. salt
1 tsp. baking soda
1 tsp. cinnamon
3 eggs, slightly beaten
1 cup granulated sugar
¾ cup canola or olive oil
1 cup shredded carrot
8oz crushed unsweetened pineapple, still in its natural juices (not heavy syrup)
2 tsp. vanilla extract
Put all ingredients in a large mixing bowl, folding, then stirring thoroughly until fully incorporated.  Pour batter into 2 greased 8x4 loaf pans. Bake at 350 degrees for 30-37 minutes, or until a toothpick comes out with moist crumbs.Note: If you want to bake them as muffins, fill greased muffins tins 2/3 full, and bake at 350 degrees for 18-22 minutes.

PS Thanks for your voting! If you haven’t voted yet, please do.

PPS Look forward to my comprehensive, critical analysis on Darwin’s “Origin Of Species”.  Although I’ve enjoyed his writing style, his content needs to be dissected properly using the Christian worldview. I will be posting this review/essay on my other blog: http://aloveofthoughts.blogspot.com/